Are you about to rip into your drywall with a hammer and pry bar? STOP! Before you unleash a cloud of dust and potentially damage the wall beyond repair, there's a crucial step you absolutely must take. Skip it, and you'll regret the mess, the wasted material, and the extra work. What is this magical, mess-saving, sanity-preserving secret? It's all about careful preparation, and this guide will walk you through it, step-by-step, ensuring a clean, efficient, and even reusable drywall removal process.
Why Is Proper Drywall Removal So Important?
Most people think drywall removal is a simple demolition job. Just bash away, right? Wrong! Improper removal leads to:
- Excessive Dust and Debris: A huge mess that takes hours to clean up.
- Damage to Surrounding Areas: Nicks and dents in framing, trim, and adjacent walls.
- Wasted Materials: Drywall is surprisingly reusable if removed carefully.
- Potential Injury: Flying debris and unstable wall sections can be dangerous.
So, how do you avoid this disaster? The answer lies in a methodical approach that prioritizes precision and control.
How Do I Remove Drywall Cleanly and Efficiently?
Here's your step-by-step guide to drywall removal done right:
Step 1: Precision Cutting is Key
- Mark Your Territory: Clearly define the area you want to remove with a pencil or marker.
- Score the Surface: Use a utility knife to score along your marked lines. This helps prevent the drywall from tearing unevenly. Multiple passes with the knife are better than one deep cut.
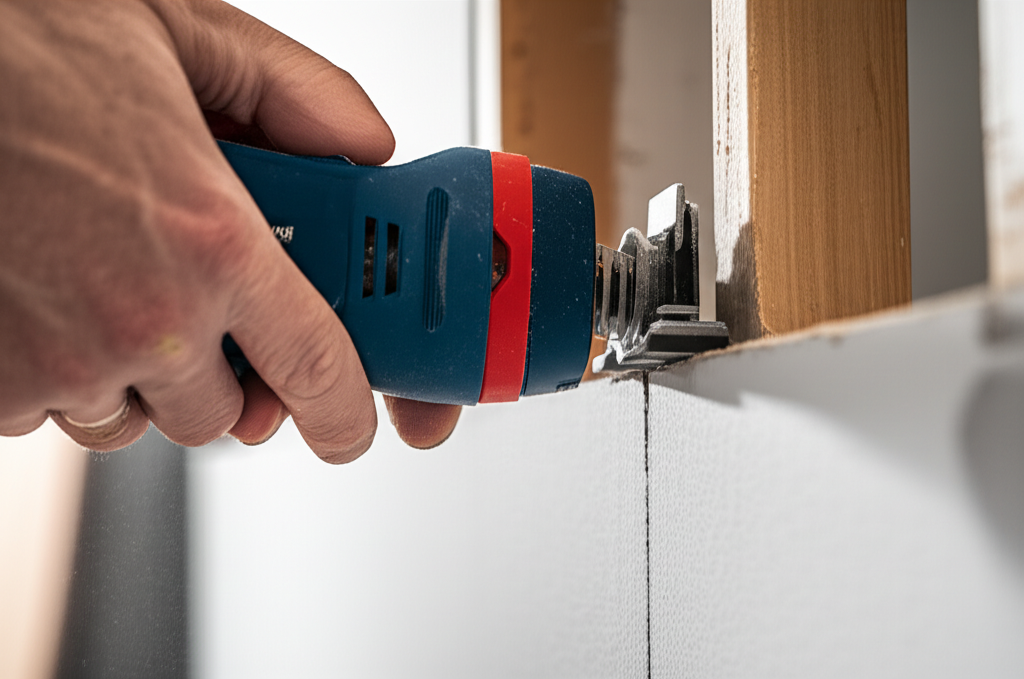
- Cut Carefully: Employ a drywall saw, oscillating multi-tool with a drywall blade, or even a reciprocating saw (with a fine-tooth blade held at an angle) to cut through the drywall along your scored lines. The goal is to cut the drywall without damaging the framing behind it.
- Remove Obstacles: Take off any trim (door, window, baseboard, crown molding) that's in the way. Remove electrical cover plates and disconnect outlets/switches (with the power OFF, of course!). Disconnect any plumbing fixtures.
Step 2: Locate the Enemy: Finding Nails and Screws
- Magnet Power: Use a strong magnet (a hard drive magnet works great!) to locate the nails or screws holding the drywall to the framing.
- Mark the Spots: Mark each nail/screw location with a colored marker. This prevents you from missing any and makes removal much easier. Turning the magnet on its end can help pinpoint the exact location.
- Understanding Spacing: In most US homes, nails/screws are spaced about 16 inches apart horizontally and 12 inches apart vertically. Keep this in mind as you search.
Step 3: Extraction Time: Removing Fasteners
- Pry Bar and Hammer (for Nails): Use a small pry bar and hammer to gently remove each nail. Position the pry bar next to the nail and tap it in until you can get under the nail head. Then, pry the nail out.
- Screwdriver or Screw Gun (for Screws): If you find screws, use a screwdriver or screw gun to remove them.
- Don't Worry About the Holes: Don't stress about creating small holes in the drywall. The focus is on cleanly removing the fasteners.
- Strategic Removal: Start with the hardest-to-reach nails/screws. Work from the top down, stopping about 4 feet from the floor. Then, work from the bottom up, stopping one row below 4 feet. Finally, remove the remaining fasteners. This prevents the drywall from suddenly falling on you.
Step 4: The Grand Finale: Removing the Drywall Sheet
- Stiction is Real: Even with all the fasteners removed, old drywall can be stuck to the framing.
- Gentle Persuasion: Use a larger pry bar to gently pull the bottom of the drywall away from the framing.
- Check for Missed Fasteners: If the drywall doesn't come easily, double-check for any nails or screws you might have missed. Don't force it!
- Horizontal vs. Vertical Installation: Drywall is typically installed horizontally with a seam at 4 feet. If that's the case, remove the bottom piece first. The top piece can then fold down along the seam. If your drywall is installed vertically, you'll have an 8-foot sheet to deal with. Wiggle it out and angle it for removal. Get help if needed!
Step 5: Clean Up and Reuse (Optional!)
- Minimal Mess: If you followed these steps, your cleanup should be minimal.
- Drywall Reuse: With a little patching compound to fill the nail holes, the drywall can often be reused! This saves you money and reduces waste.
What Tools Do I Need for Clean Drywall Removal?
- Utility knife
- Drywall saw, oscillating multi-tool, or reciprocating saw with a fine-tooth blade
- Strong magnet
- Colored marker
- Small pry bar
- Hammer
- Screwdriver or screw gun (if applicable)
- Large pry bar
- Safety glasses
- Dust mask
Frequently Asked Questions
Q: Can I really reuse drywall after removing it? A: Yes! If you remove the drywall carefully, as described above, it can often be reused. Just fill the nail/screw holes with patching compound, sand smooth, and repaint.
Q: What's the best way to cut drywall without creating a lot of dust? A: Scoring the drywall with a utility knife before cutting helps to create a cleaner cut and reduces dust. Also, using an oscillating multi-tool with a dust collection attachment is a great option.
Q: Is it safe to remove drywall myself, or should I hire a professional? A: If you're comfortable working with tools and following safety precautions, you can remove drywall yourself. However, if you're dealing with a large area, or if you're unsure about any part of the process, it's always best to hire a professional.
Stop Wasting Time and Money: Remove Drywall Like a Pro
Removing drywall doesn't have to be a messy, destructive nightmare. By following these steps, you can minimize dust, prevent damage, and even reuse the drywall. So, ditch the hammer-smashing approach and embrace a smarter, more efficient method. You'll save time, money, and a whole lot of headaches. Now get out there and reclaim your space!