We've all been there. You poured your heart and soul (and maybe a little sweat and tears) into a DIY project, only to step back and think, "Well, that… looks DIY." Why is it that some DIY projects look professional and polished, while others scream "amateur hour"? Is it skill? Materials? Secret knowledge? The answer is simpler than you think.
The single, most impactful reason why your DIY project looks DIY is… lack of proper surface preparation.
It's not the fancy tools, the expensive materials, or even innate talent. It's the often-overlooked, undeniably crucial step of preparing your surface before you even think about picking up a paintbrush or a power drill. Without a flawlessly prepped surface, any imperfections will be magnified, leading to a finished product that looks… well, DIY.
Why is Surface Preparation So Important?
Think of it like this: you wouldn't build a house on a shaky foundation, would you? Surface preparation is the foundation of any successful DIY project. It ensures proper adhesion of paints, stains, or finishes, creates a smooth and even surface, and prevents future problems like peeling, chipping, or uneven color.
How Does Poor Surface Prep Ruin a DIY Project?
- Uneven Finish: Bumps, scratches, or existing textures will show through, creating an unprofessional look.
- Poor Adhesion: Paint or finish may not adhere properly to a dirty or improperly sanded surface, leading to peeling and chipping.
- Color Imperfections: Existing stains or colors can bleed through, affecting the final color and creating an uneven appearance.
- Increased Wear and Tear: A poorly prepared surface is more susceptible to damage from everyday use.
What Does Proper Surface Preparation Actually Entail?
The specific steps for surface preparation will vary depending on the material you're working with (wood, metal, plastic, etc.) and the desired finish. However, the fundamental principles remain the same:
1. Cleaning: Removing Dirt, Grime, and Old Finishes
This is the most basic step, but often the most overlooked. Use a suitable cleaner to remove any dirt, grease, oil, wax, or other contaminants from the surface. For wood, a mild soap and water solution works well. For metal, you may need a degreaser.
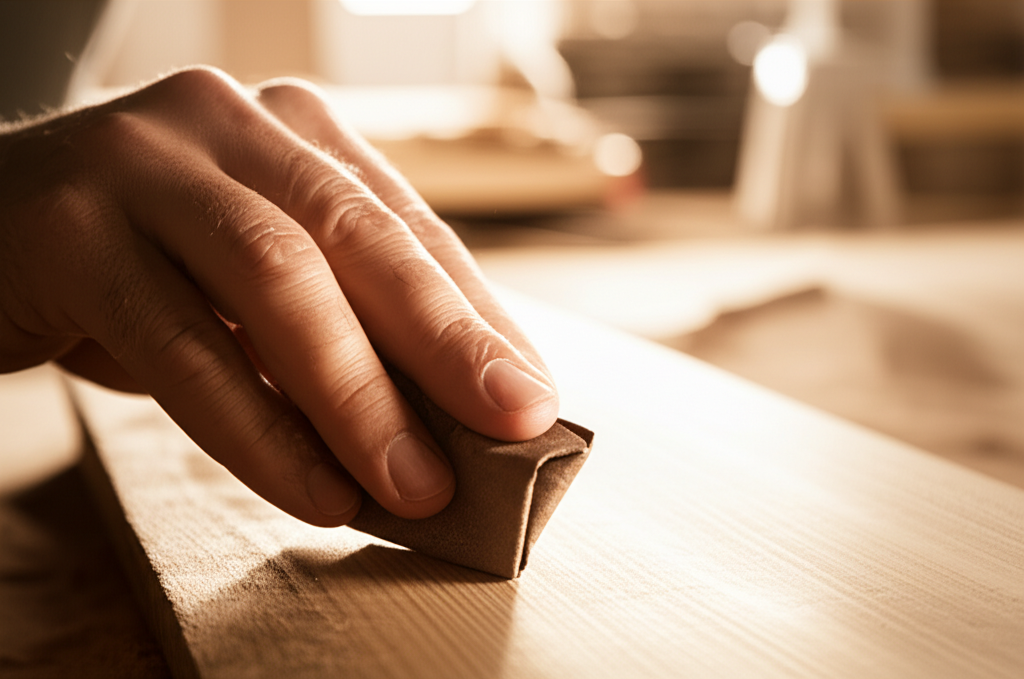
2. Sanding: Creating a Smooth and Even Surface
Sanding is essential for creating a smooth and even surface and for providing "tooth" for the finish to adhere to. Start with a coarser grit sandpaper to remove any imperfections, then gradually work your way up to finer grits to achieve a smooth finish. Always sand with the grain.
3. Filling: Repairing Imperfections
Fill any holes, cracks, or dents with wood filler, spackle, or other appropriate filler. Allow the filler to dry completely, then sand it smooth.
4. Priming: Creating a Uniform Base
Priming is often overlooked, but it's crucial for creating a uniform base for your finish. Primer helps to seal the surface, prevent bleed-through, and improve adhesion. Choose a primer that is compatible with your finish and the material you're working with.
5. Tack Cloth: The Final Touch
Before applying your finish, wipe down the surface with a tack cloth to remove any remaining dust or debris. This will ensure a smooth and flawless finish.
What Are Some Common Surface Preparation Mistakes?
- Skipping Cleaning: Applying paint or finish over a dirty surface is a recipe for disaster.
- Using the Wrong Sandpaper: Using sandpaper that is too coarse can damage the surface, while using sandpaper that is too fine won't remove imperfections.
- Not Sanding Properly: Sanding against the grain, skipping grits, or not sanding evenly can create an uneven finish.
- Ignoring Imperfections: Failing to fill holes or cracks will result in a less-than-professional finish.
- Skipping Primer: Primer is essential for creating a uniform base and improving adhesion.
How Can I Learn More About Surface Preparation?
There are countless resources available online, including tutorials, videos, and articles. Search for specific techniques related to the material you're working with. Don't be afraid to experiment and practice on scrap pieces of material before tackling your main project. Local hardware stores often offer workshops and advice as well.
Frequently Asked Questions
What kind of sandpaper should I use?
The grit of sandpaper you need depends on the project. Start with a coarser grit (80-120) to remove imperfections, then move to medium (150-180) and finish with fine (220+) for a smooth finish.
Do I really need to use primer?
Yes! Primer is essential for proper adhesion, preventing bleed-through, and achieving a uniform finish. It's a step you shouldn't skip.
How long should I wait for filler to dry before sanding?
Always follow the manufacturer's instructions on the filler container. Generally, you'll need to wait at least 24 hours for the filler to dry completely before sanding.
The Takeaway: Master Surface Prep, Master Your DIY
By focusing on proper surface preparation, you can dramatically improve the quality and appearance of your DIY projects. It's the single most important factor in achieving a professional-looking finish. So, take the time to do it right, and you'll be amazed at the results. Invest in the prep work, and your DIYs will go from "homemade" to "handcrafted masterpieces!" Now, go forth and create something beautiful!